1 Introdução ao Tutorial do MS Access 2010, 2013, 2016 e 2019
Bem-vindo ao tutorial do MS Access. Este tutorial foi projetado para colocar o usuário em funcionamento com o MS Access (doravante simplesmente “Acesso”) de maneira rápida. São demonstrados os quatro módulos básicos do Access:Tabelas, Formulários, Relatórios e Consultas. Um exemplo de negócios é discutido primeiro, o qual fornece uma base para o desenvolvimento de um banco de dados simples.
Supõe-se que os usuários deste tutorial sejam proficientes em trabalhar com Microsoft Windows XP/Vista/Win7/Win10, etc. e com MS Excel. Isso inclui o uso do teclado e do mouse. O tutorial é baseado no Microsoft Access, que faz parte do pacote Microsoft Office Professional, que também inclui MS Excel, MS Word e MS Powerpoint.
Este tutorial abrange o MS Access 2007, 2010, 2013, 2016 e 2019, que possuem uma interface comum (a “barra de fita” na parte superior) diferente das versões anteriores. Se você estiver interessado em trabalhar com o MS Access '97 ou 2000, visite a página do Microsoft Access Tutorial – Cobrindo o MS Access '97 e 2000.
O tutorial começa com uma breve visão geral dos Bancos de dados relacionais . A maioria dos sistemas de gerenciamento de banco de dados em uso hoje são baseados no que é chamado de modelo de banco de dados relacional. O Access é um sistema de gerenciamento de banco de dados relacional. Em seguida, descrevemos um exemplo de negócios e fornecemos um esboço do banco de dados e dos aplicativos que desejamos desenvolver. Nas seções a seguir, fornecemos instruções passo a passo para criar as tabelas, formulários de entrada de dados, relatórios e consultas para o aplicativo.
1.1 Público-alvo
Este tutorial destina-se a alunos que estão começando a usar o sistema de gerenciamento de banco de dados MS Access.
1.2 Conhecimento pré-requisito
Este tutorial pressupõe que o aluno esteja familiarizado com a operação básica de um computador pessoal e Windows 2000, Windows XP, Windows Vista ou Windows 7. As habilidades específicas necessárias para este tutorial são:
- Uso do mouse e do teclado
- Abrindo e salvando arquivos no disco rígido e no pen drive USB (pen drive), por exemplo
- Gerenciando arquivos em geral, incluindo a diferença entre letras de unidade, disco rígido etc.
- Executando programas a partir do menu Iniciar do Windows
- Minimizar, maximizar e redimensionar janelas
O aluno deverá ter um pendrive USB (pen drive) ou outro dispositivo de memória portátil disponível para armazenar seus arquivos que serão criados durante este tutorial.
1.3 Executando o Microsoft Access em um Apple Mac
Um problema que pode enfrentar alguns alunos é o fato de que o MS Access é executado apenas no sistema operacional Windows (como Windows XP, Vista ou Windows 7). Se você possui um MacBook, iMac ou outro sistema Apple executando MacOS que usa uma CPU Intel, existem algumas alternativas possíveis que você pode tentar. Muitos computadores Apple modernos que usam CPU Intel podem executar o sistema operacional Windows. Observe que você precisará de uma cópia legalmente licenciada do sistema operacional Windows para fazer isso. Existem duas maneiras principais de fazer isso:
- Você pode configurar seu Mac para “Dual Boot” tanto no MacOS X quanto no Windows. Um produto que pode permitir isso é o software Apple BootCamp.
- Você pode executar o Windows OS “lado a lado” com o Mac OS X usando um computador “virtual” como o VirtualBox
Índice
- 1 Introdução ao Tutorial do MS Access
- 1.1 Público-alvo
- 1.2 Conhecimento pré-requisito
- 1.3 Executando o Microsoft Access em um Apple Mac
- 2 Breve visão geral de bancos de dados relacionais e aplicativos de banco de dados
- 3 Um exemplo de negócios
- 4 Iniciando o Microsoft Access
- 4.1 Revisão de como iniciar o Microsoft Access
- 5 Criando e visualizando tabelas
- 5.1 Criando uma tabela usando a visualização de design
- 5.2 Exercício:criando uma tabela
- 5.3 Como visualizar e adicionar dados a uma tabela
- 5.4 Exercício:adicionando dados a uma tabela
- 5.5 Criando relacionamentos entre tabelas
- 5.6 Revisão da criação e visualização de tabelas
- 6 Criando e executando consultas
- 6.1 Consultas de tabela única
- 6.2 Exercício:consultas de tabela única
- 6.3 Consultas de várias tabelas
- 6.4 Exercício:consultas de várias tabelas
- 6.5 Revisão da criação e execução de consultas
- 7 Criando e executando formulários de entrada de dados
- 7.1 Criando um formulário de tabela única usando o assistente
- 7.2 Exercício:Criando um formulário de tabela única
- 7.3 Revisão da criação e execução de um formulário de entrada de dados
- 8 Criação e execução de relatórios
- 8.1 Criando um relatório de tabela única usando o assistente
- 8.2 Exercício:criando um relatório de tabela única
- 8.3 Revisão da criação e execução de um relatório
- 9 Criando e executando um formulário mestre/detalhe (formulário com um subformulário)
- 10 Criando e executando um painel de controle
- 11 Criando e executando um formulário de navegação
- 11.1 Exercício:modificando um formulário de navegação
- 11.2 Definindo o formulário de navegação como padrão
- 12 Resumo do tutorial e tópicos avançados
A próxima página fornece uma breve introdução aos Bancos de Dados Relacionais.
2 Breve visão geral de bancos de dados relacionais e aplicativos de banco de dados
Os primeiros bancos de dados implementados durante as décadas de 1960 e 1970 foram baseados em arquivos de dados simples ou nos modelos de dados hierárquicos ou em rede. Esses métodos de armazenamento de dados eram relativamente inflexíveis devido à sua estrutura rígida e grande dependência de programas aplicativos para realizar até mesmo o processamento mais rotineiro.
No final da década de 1970, o modelo de banco de dados relacional que se originou na comunidade de pesquisa acadêmica tornou-se disponível em implementações comerciais como IBM DB2 e Oracle. O modelo de dados relacional especifica os dados armazenados em relações que têm alguns relacionamentos entre eles (daí o nome relacional ).
Em bancos de dados relacionais como Sybase, MySQL, Oracle, IBM DB2, MS SQL Server e MS Access, os dados são armazenados em tabelas composto por uma ou mais colunas (O acesso chama uma coluna de campo ). Os dados armazenados em cada coluna devem ser de um único tipo de dados como Caractere (às vezes chamado de “string”), Número ou Data. Uma coleção de valores de cada coluna de uma tabela é chamada de registro ou uma linha na mesa.
Tabelas diferentes podem ter a mesma coluna em comum. Esse recurso é usado para especificar explicitamente um relacionamento entre duas tabelas. Os valores que aparecem na coluna A em uma tabela são compartilhados com outra tabela.
Abaixo estão dois exemplos de tabelas em um banco de dados relacional para um banco local:
Tabela de clientes
| ID do cliente | Nome | Sobrenome | Endereço da rua | Cidade | Estado | CEP |
|---|---|---|---|---|---|---|
| Número | Personagem | Personagem | Personagem | Personagem | Personagem | Personagem |
| 1001 | José | Smith | 123 Lexington | Smithville | KY | 91232 |
| 1002 | Alberta | Jones | 12 Davis Avenue | Smithville | KY | 91232 |
| 1003 | Nathanial | Machado | 443 Moedor Ln. | Broadville | GA | 81992 |
| 1004 | Paulina | Construtor | 661 Parker Road | Streetville | GA | 81990 |
Tabela de contas
| ID do cliente | Número da conta | Tipo de conta | Data de abertura | Saldo |
|---|---|---|---|---|
| Número | Número | Personagem | Data | Número |
| 1001 | 9987 | Verificando | 12/10/1989 | 4.000,00 |
| 1001 | 9980 | Economia | 12/10/1989 | 2.000,00 |
| 1002 | 8811 | Economia | 01/05/1992 | 1.000,00 |
| 1003 | 4422 | Verificando | 12/01/1994 | 6.000,00 |
| 1003 | 4433 | Economia | 12/01/1994 | 9.000,00 |
| 1004 | 3322 | Economia | 22/08/1994 | 500,00 |
| 1004 | 1122 | Verificando | 13/11/1988 | 800,00 |
A tabela Customer tem 7 colunas (CustomerID, First Name, Last Name, Street Address, City, State e Zip) e 4 linhas (ou registros) de dados. A tabela Accounts tem 5 colunas (CustomerID, AccountNumber, AccountType, DateOpened e Balance) com 7 linhas de dados.
Cada uma das colunas está em conformidade com um dos três tipos de dados básicos :Caractere, Número ou Data. O tipo de dados de uma coluna indica o tipo de valores de dados que podem ser armazenados nessa coluna.
- Número – só pode armazenar números, possivelmente com um ponto decimal. Pode ser positivo ou negativo.
- Caractere – pode armazenar números, letras e pontuação. O Access chama esse tipo de dados Texto .
- Data – só pode armazenar dados de data e hora.
Em algumas implementações de banco de dados existem outros tipos de dados, como Imagens (para imagens ou outros dados). No entanto, os três tipos de dados acima são os mais usados.
Observe que as duas tabelas compartilham a coluna CustomerID e que os valores da coluna CustomerID na tabela Customer são os mesmos valores da coluna CustomerID na tabela Accounts. Este relacionamento nos permite especificar que o Cliente Nathanial Axe tem uma conta Corrente e uma Poupança que foram abertas no mesmo dia:1º de dezembro de 1994.
Outro nome dado a esse relacionamento é Mestre/Detalhe . Em um relacionamento mestre/detalhe, um único registro mestre (como Cliente 1003, Nathanial Axe) pode ter muitos registros de detalhes (as duas contas) associados a ele.
Em um relacionamento Mestre/Detalhe, é possível que um registro Mestre exista sem nenhum Detalhe. No entanto, é impossível ter um registro de detalhes sem um registro mestre correspondente. Por exemplo, um Cliente pode não ter necessariamente nenhuma informação de conta. No entanto, qualquer informação da conta deve estar associado a um único Cliente.
Cada tabela também deve ter uma coluna especial chamada Chave que é usado para identificar exclusivamente linhas ou registros na tabela. Os valores em uma coluna-chave (ou colunas) nunca podem ser duplicados. Nas tabelas acima, o CustomerID é a chave para a tabela Customer, enquanto o AccountNumber é a chave para a tabela Accounts.
3 Um Exemplo de Negócios
Nesta seção, descreveremos um exemplo de negócios que será usado como base para os exemplos ao longo do tutorial. Nas organizações, o trabalho de analisar o negócio e determinar a estrutura de banco de dados apropriada (tabelas e colunas) é normalmente realizado por Analistas de Sistemas . Um Analista de Sistemas reunirá informações sobre como o negócio funciona e formará um modelo dos requisitos de armazenamento de dados. A partir desse modelo, um programador de banco de dados criará as tabelas de banco de dados e trabalhará com os desenvolvedores de aplicativos para desenvolver o restante do aplicativo de banco de dados.
Para este tutorial, consideraremos um negócio bancário simples. O banco tem muitos clientes que abrem e mantêm uma ou mais contas. Para cada Cliente, mantemos um registro de seu nome e endereço. Também atribuímos a eles um CustomerID exclusivo. Atribuímos esse identificador exclusivo por conveniência e precisão. É muito mais fácil identificar um único cliente usando seu CustomerID em vez de procurar seu nome completo e endereço. Além disso, é possível que o banco tenha dois clientes com o mesmo nome (por exemplo, Bill Smith). Nesses casos, o CustomerID exclusivo sempre pode ser usado para diferenciá-los.
De maneira semelhante, todas as contas recebem um número de conta exclusivo. Uma conta pode ser uma conta corrente ou uma conta poupança. As contas de poupança rendem juros, mas as únicas transações permitidas são depósitos e saques. As contas correntes não rendem juros. Mantemos a data em que a conta foi aberta. Isso nos ajuda a rastrear nossos clientes e pode ser útil para fins de marketing. Por fim, mantemos o saldo atual de uma conta.
Na seção anterior, fornecemos a estrutura e alguns dados de exemplo para a tabela Customer e a tabela Accounts. Estes serão utilizados para suportar a parte de armazenamento de dados da nossa aplicação Bancária.
Aplicativos de banco de dados
Em qualquer aplicativo de banco de dados, cada uma das tabelas requer um meio para obter dados nelas e para recuperar e modificar os dados posteriormente. A principal maneira de obter dados em tabelas é usar formulários de entrada de dados. As principais maneiras de recuperar dados das tabelas ou exibir dados em tabelas são usar consultas ou relatórios. Em um aplicativo de banco de dados completo, todos os formulários e relatórios são vinculados em um Formulário de Navegação – uma única página que terá links para cada uma das partes do aplicativo. Um grande aplicativo de banco de dados pode ter dezenas de formulários e relatórios de entrada de dados.
Para este tutorial, criaremos um formulário de entrada de dados para cada tabela, uma consulta para cada tabela e um relatório para cada tabela.
Nas seções a seguir, apresentaremos primeiro como iniciar o Access e como criar um novo banco de dados.
4 Iniciando o Microsoft Access
Como acontece com a maioria dos programas do Windows, o Access pode ser executado navegando no menu Iniciar no canto inferior esquerdo da área de trabalho do Windows.
Para iniciar o Access, clique no botão Iniciar, depois no menu Programas, vá para o menu Microsoft Office e, finalmente, clique no item de menu Microsoft Access. O menu do MS Office Professional é mostrado abaixo.
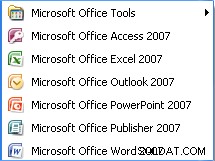
Observe que esta disposição dos menus pode variar dependendo de como o MS Office foi instalado no PC que você está usando.
Assim que o Access estiver em execução, uma tela inicial será exibida:
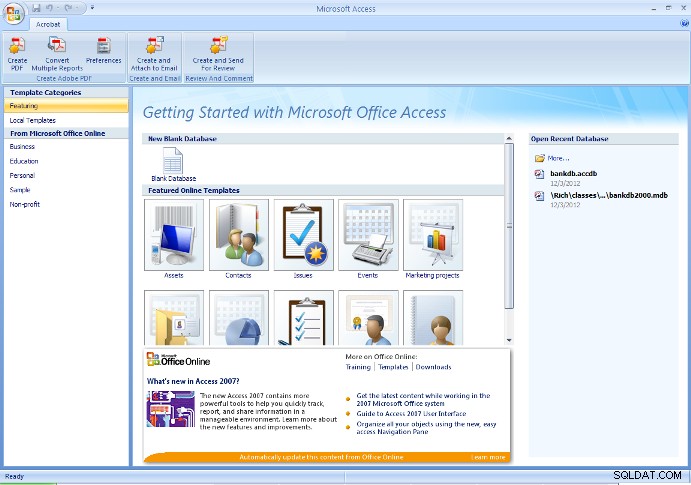
A partir desta tela inicial, o usuário pode criar um novo banco de dados (em branco ou com algumas tabelas criadas com o assistente de banco de dados), ou abrir um banco de dados existente.
Em geral, na primeira vez que se inicia um projeto, um novo banco de dados em branco deve ser criado. Após esse ponto, use o Abrir banco de dados existente opção para reabrir o banco de dados criado anteriormente.
Aviso – Se você criou um banco de dados anteriormente e depois o criou novamente usando o mesmo nome, você substituirá qualquer trabalho que tenha feito.
Para os propósitos deste tutorial, se você estiver passando por essas etapas pela primeira vez, escolha a opção de criar um novo banco de dados em branco, conforme mostrado na figura acima.
No Access 2007, clique no botão redondo do Office no canto superior esquerdo e escolha Novo no menu suspenso. Preencha Nome do arquivo como bankdb.accdb e clique no botão Create para criar o banco de dados conforme a figura abaixo.
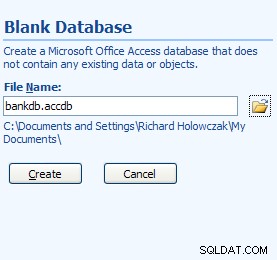
Nova tela de banco de dados para o Access 2007
No nome do arquivo acima, bankdb é o nome escolhido para esse banco de dados específico e .accdb é a extensão de nome de arquivo fornecida para Microsoft DataBase 2007, arquivos de 2010 e 2013.
É aconselhável manter o nome do banco de dados (bankdb no exemplo acima) relativamente curto e não usar espaços ou outras pontuações no nome do banco de dados. Além disso, o nome do banco de dados deve refletir o conteúdo do banco de dados.
Assim que o novo banco de dados for criado, a seguinte tela principal de acesso aparecerá:
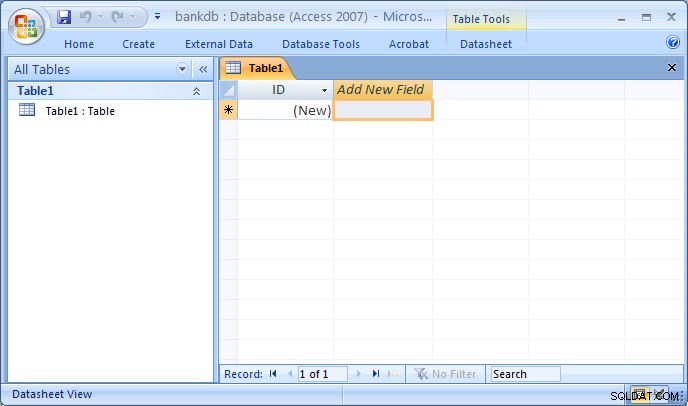
O layout da tela do MS Access 2007 é significativamente diferente das versões anteriores. A maioria das guias na parte superior da tela foi reorganizada. Além disso, a tela principal padrão após a criação de um novo banco de dados muda automaticamente para a visualização Design para criar uma nova tabela.
As seguintes abas aparecerão na parte superior da tela:
- Guia inicial – Controles para alterar fontes, realizar consultas, copiar/colar/recortar dados, etc.
- Criar guia – Controles para criação de tabelas, formulários, relatórios, etc.
- Guia Dados externos – Controles para carregar dados de outras fontes de dados no MS Access.
- Guia Ferramentas de banco de dados – Controles para gerenciamento de bancos de dados (segurança, central telefônica, etc.)
- guia Design – Isso aparecerá ao criar uma nova tabela, formulário, relatório etc.
Observe que as interfaces do Access 2007, 2010 e 2013 são todas semelhantes, embora a versão que você usa possa parecer um pouco diferente das imagens incluídas neste tutorial.
4.1 Revisão do início do Microsoft Access
Para iniciar o Microsoft Access:
- Use o botão Iniciar na barra de tarefas para abrir:Programas -> MS Office -> Microsoft Access
- Para criar um novo banco de dados, escolha Banco de dados em branco e especifique um novo nome de arquivo para o banco de dados. Certifique-se de usar um nome descritivo para o novo banco de dados. Clique no botão OK para criar o novo banco de dados.
- Para abrir um banco de dados existente, escolha Abrir um banco de dados existente , realce Mais arquivos… e clique no botão OK. Em seguida, navegue até a unidade, destaque o arquivo de banco de dados existente no disco rígido ou unidade USB e clique no botão OK novamente para abrir o banco de dados.
Para sair do Access, abra o menu Arquivo (ou menu Office) e selecione o item de menu Sair.
5 Criando e visualizando tabelas
As tabelas são as principais unidades de armazenamento de dados no Access. Lembre-se de que uma tabela é composta por uma ou mais colunas (ou campos ) e que uma determinada coluna pode aparecer em mais de uma tabela para indicar uma relação entre as tabelas.
A partir do exemplo de negócios discutido anteriormente, concluímos que duas tabelas seriam suficientes para armazenar os dados sobre Clientes e suas Contas bancárias . Agora damos as instruções passo a passo para criar essas duas tabelas no Access.
Há várias maneiras de criar uma tabela no Access. O Access fornece assistentes que orientam o usuário na criação de uma tabela, sugerindo nomes para tabelas e colunas. A outra maneira principal de criar uma tabela é usando o Design View para definir manualmente as colunas (campos) e seus tipos de dados.
Embora usar os assistentes seja uma maneira rápida de criar tabelas, o usuário tem menos controle sobre os nomes das colunas (campos) e os tipos de dados. Neste tutorial, descreveremos as etapas para criar uma tabela usando a Design View . Os alunos são incentivados a experimentar por conta própria usando o assistente Criar Tabela.
5.1 Criando uma tabela usando a visualização de design
Para criar uma tabela no Access usando o Modo Design, execute as seguintes etapas:
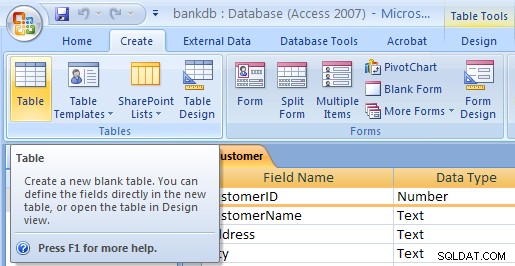
- No Access 2007, 2010 e 2013, a guia Criar nova tabela já deve estar destacada e uma nova tabela chamada table1 deve ser criada. Se não for o caso, clique no botão Criar guia e clique na Tabela ícone. Em seguida, puxe para baixo a Visualizar menu e escolha Visualização de design .

- A visualização de design da tabela será exibida. Preencha o Nome do campo , Tipo de dados e Descrição para cada coluna/campo na tabela. O campo CustomerID é preenchido abaixo:
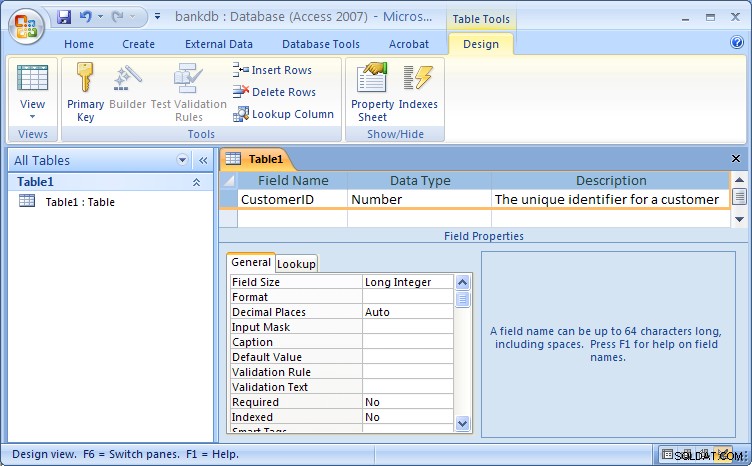
Table Design View for Access 2007
Observe que o nome padrão fornecido para a tabela é Tabela1 . Em uma etapa posterior, atribuiremos um nome apropriado para esta tabela.
Preencha as informações dos campos da seguinte forma:
Nome do campo Tipo de dados Descrição ID do cliente Número O identificador exclusivo de um cliente Nome Texto O primeiro nome do cliente Sobrenome Texto O sobrenome do cliente Endereço da Rua Texto O endereço do cliente Cidade Texto A cidade do cliente Estado Texto O estado de origem do cliente Zip Texto O CEP do Cliente
Uma figura mostrando a visualização do projeto com a nova definição de tabela preenchida é fornecida abaixo:

O próximo passo é definir a chave para a tabela e salvar a tabela.
- Agora que todos os campos foram definidos para a tabela, uma Chave Primária deve ser definida. Lembre-se de que a Chave Primária será usada para identificar exclusivamente um registro na tabela (neste caso, um Cliente). Destaque o CustomerID campo e clique no botão Chave Primária na barra de botões
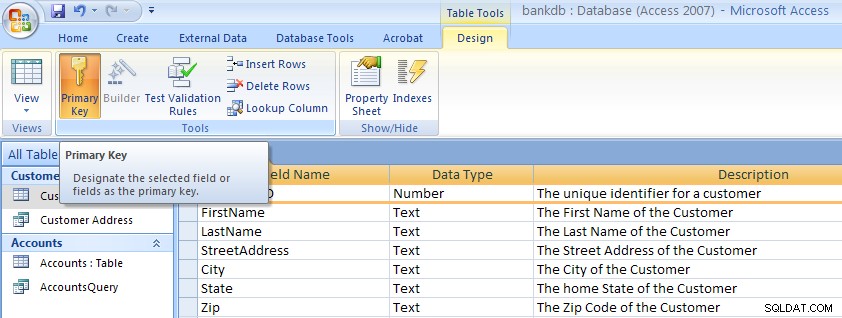 Observe que uma pequena chave aparece ao lado do nome do campo no lado esquerdo. Observação:Para remover uma chave primária , basta repetir este procedimento para desativar a chave primária.
- Como etapa final, a tabela deve ser salva. Abra o menu Office e escolha o item de menu Salvar como. Uma caixa de diálogo aparecerá onde o nome da nova tabela deve ser especificado. Observe que o Access fornece um nome padrão, como Tabela1 ou Tabela2 . Basta digitar sobre este nome padrão o nome da tabela. Para este exemplo, nomeie a tabela:Cliente Em seguida, clique no botão OK.
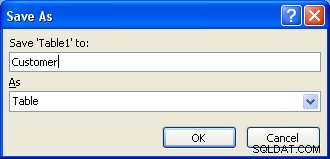
Neste ponto, a nova tabela Customer foi criada e salva.
Uma observação sobre nomenclatura de campos (colunas) no MS Access
Ao definir os campos (colunas) para uma tabela, é importante usar nomes de campo que forneçam uma compreensão clara do conteúdo de dados da coluna. Por exemplo, o campo CNO indica um Número de Cliente ou um Número de Contêiner?
Os nomes de campo no Access podem ter até 64 caracteres e podem conter espaços. No entanto, o uso de espaços em nomes de campos e nomes de tabelas é fortemente desencorajado . Se você deseja tornar os nomes dos campos mais fáceis de ler, considere usar um caractere de sublinhado para separar as palavras. No entanto, certifique-se de que nenhum espaço apareça antes ou depois do sublinhado.
A tabela a seguir resume algumas maneiras diferentes de fornecer nomes de campo:
| Descrição | Ruim | Bom |
|---|---|---|
| Identificador exclusivo para um cliente | CID | CustomerID ou Customer_ID |
| Descrição de um produto | PDESC | Descrição do produto |
| Número de telefone residencial do funcionário | Employee_home_telephone_number | Telefone residencial |
| Número da conta bancária | BA# | Número da conta |
5.2 Exercício:Criando uma Tabela
Crie as Contas tabela seguindo as mesmas etapas usadas para criar a tabela Customer.
- Clique na guia Criar e, em seguida, clique na Tabela botão.
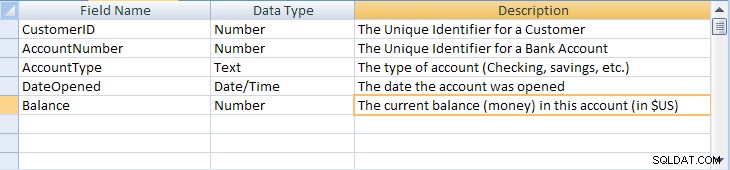
- Abra o menu Exibir e escolha Design. A Visualização de Design de Tabela aparecerá. Preencha o Nome do campo , Tipo de dados e Descrição para cada coluna/campo na tabela Contas.
Nome do campo Tipo de dados Descrição ID do cliente Número O identificador exclusivo de um cliente Número da conta Número O identificador exclusivo de uma conta bancária Tipo de Conta Texto O tipo de conta (corrente, poupança, etc.) Data de abertura Data A data em que a conta foi aberta Saldo Número O saldo atual (dinheiro) nesta conta (em US$)
Uma figura mostrando a visualização do projeto com a nova definição de tabela preenchida é fornecida abaixo:
- Defina uma chave primária para a tabela Contas. Clique no Número da conta campo com a Direita botão do mouse e escolha Chave primária no menu pop-up.
- Salve a nova tabela Contas, abrindo o menu Arquivo e escolhendo o item de menu Salvar. Preencha o nome da tabela:Contas Em seguida, clique no botão OK.
Observe que há várias etapas adicionais que podem ser executadas para melhorar e embelezar as tabelas no MS Access, incluindo especificar valores padrão, criar valores de pesquisa e mascarar entradas de dados para seguir um padrão específico. Os detalhes não são importantes para este tutorial atual, mas se estiver interessado, confira a página Advanced MS Access Table Design vinculada aqui.
5.3 Visualizando e adicionando dados a uma tabela
Os dados podem ser adicionados, excluídos ou modificados em tabelas usando uma exibição simples semelhante a uma planilha. Para abrir esta visualização dos dados de uma única tabela, realce o nome da tabela e clique duas vezes no nome da tabela.
Nesta visualização da tabela Cliente, mostrada na figura abaixo, os campos (colunas) aparecem na parte superior da janela e as linhas ou registros aparecem abaixo. Essa visualização é semelhante a como uma planilha seria projetada.
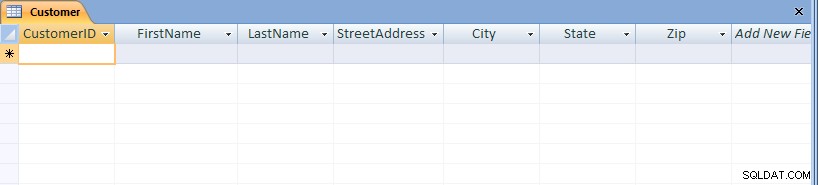
Observe na parte inferior da janela que o número de registros é exibido. Nesse caso, como a tabela acabou de ser criada, aparece apenas um registro em branco.
Para adicionar dados à tabela, basta digitar valores para cada um dos campos (colunas). Pressione a tecla Tab para mover-se entre os campos dentro de um registro. Use as teclas de seta para cima e para baixo para mover-se entre os registros. Insira os dados conforme abaixo:
| ID do cliente | Nome | Sobrenome | Endereço da rua | Cidade | Estado | CEP |
|---|---|---|---|---|---|---|
| 1001 | José | Smith | 123 Lexington | Smithville | KY | 91232 |
| 1002 | Alberta | Jones | 12 Davis Avenue | Smithville | KY | 91232 |
| 1003 | Nathanial | Machado | 443 Moedor Ln. | Broadville | GA | 81992 |
| 1004 | Paulina | Construtor | 661 Parker Road | Streetville | GA | 81990 |

Para salvar os novos dados, abra o menu Office e escolha Salvar.
Para navegar para outros registros na tabela, use a barra de navegação na parte inferior da tela:

Para modificar os dados existentes, basta navegar até o registro de interesse e tabular até o campo apropriado. Use as teclas de seta e as teclas delete ou backspace para alterar os dados existentes.
Para excluir um registro, primeiro navegue até o registro de seu interesse. Em seguida, abra o menu Editar e escolha o item de menu Excluir.
Para fechar a tabela e retornar à tela principal do Access, abra o menu Arquivo e escolha o item de menu Fechar.
5.4 Exercício:adicionando dados a uma tabela
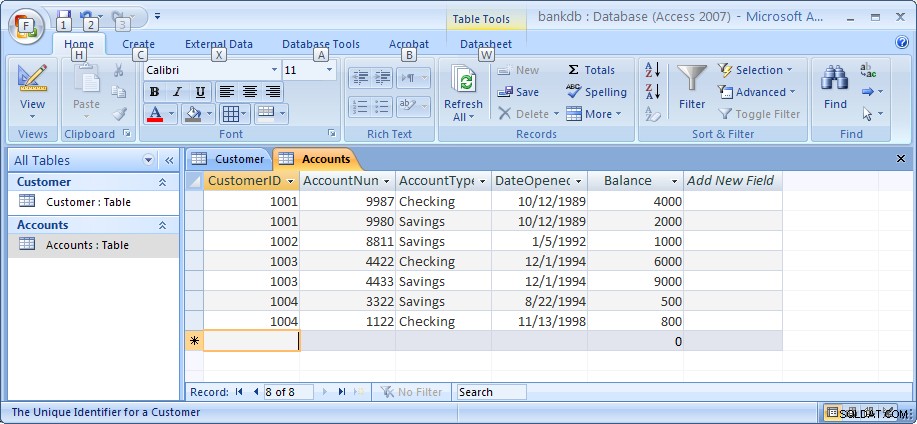
Para este exercício, abra a tabela Accounts e adicione dados para as sete contas mostradas na seção 2. Certifique-se de inserir os dados exatamente como mostrados, incluindo a capitalização dos dados no campo AccountType. por exemplo, digite Poupança em vez de poupança ou ECONOMIA.
Observe que, ao inserir as datas, digite os quatro dígitos completos do ano. Por padrão, o Access exibe todos os 4 dígitos do ano (a versão mais antiga do Access exibia apenas dois dígitos).
Certifique-se de salvar os dados quando terminar. A figura abaixo mostra a tabela Contas e os dados como devem aparecer quando você terminar este exercício.
Neste ponto do tutorial, criamos duas tabelas, Clientes e Contas, e adicionamos dados a cada uma. Nas seções subsequentes, abordaremos como consultar e relatar os dados nas tabelas e como criar um formulário de entrada de dados amigável usando os assistentes do Access.
Nota:Meu tutorial sobre MS Access Advanced Table Design pode ser encontrado neste link. Você pode verificar isso depois de concluir o restante deste tutorial.
5.5 Criando relacionamentos entre tabelas
Lembre-se de que uma das principais características dos bancos de dados relacionais é o fato de todas as tabelas estarem relacionadas entre si. Na base de dados do Banco até agora, a tabela Clientes está relacionada à tabela Contas em virtude do campo CódigoDoCliente que aparece em ambas as tabelas. O Access tem um meio de tornar esse relacionamento explícito usando a tela Relacionamentos. O Access usa essas informações ao criar relatórios, formulários e consultas que exigem a exibição de mais de uma tabela.
Para começar, certifique-se de que a tabela Contas e a tabela Cliente estejam fechadas. O acesso interromperá a criação de quaisquer relacionamentos se a tabela estiver aberta no momento. Para fechar uma tabela, clique com o botão direito do mouse no nome da tabela na guia acima da tabela e escolha o item de menu fechar ou clique no pequeno X logo acima da tabela.

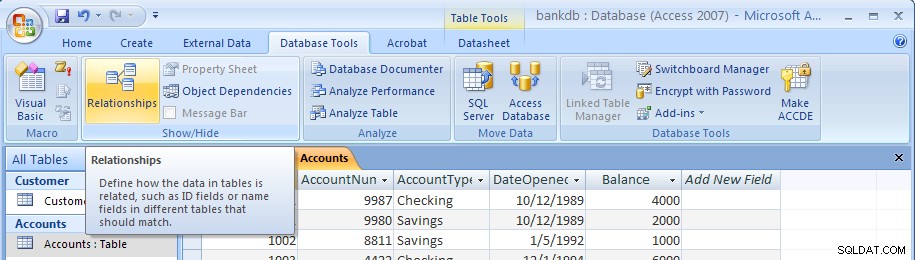
Em seguida, exiba a tela Relacionamentos clicando na guia Ferramentas do Banco de Dados e, em seguida, clique no botão Relacionamentos, conforme mostrado abaixo.
A tela Relacionamentos em branco aparecerá da seguinte forma:
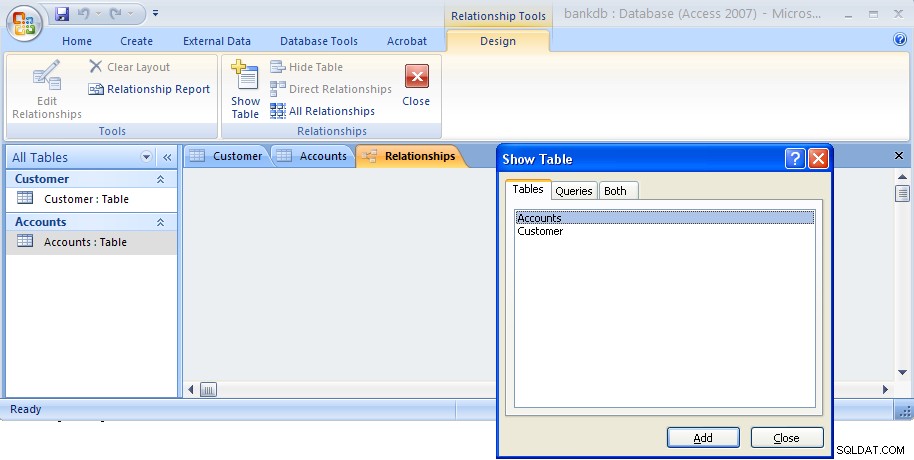
A caixa de diálogo Mostrar tabela aparecerá por padrão. Realce a tabela Clientes e a tabela Contas conforme mostrado abaixo e clique no botão Adicionar.

Em seguida, clique no botão Fechar para fechar esta caixa de diálogo. A tela Relacionamentos agora reaparecerá com as duas tabelas exibidas conforme abaixo:
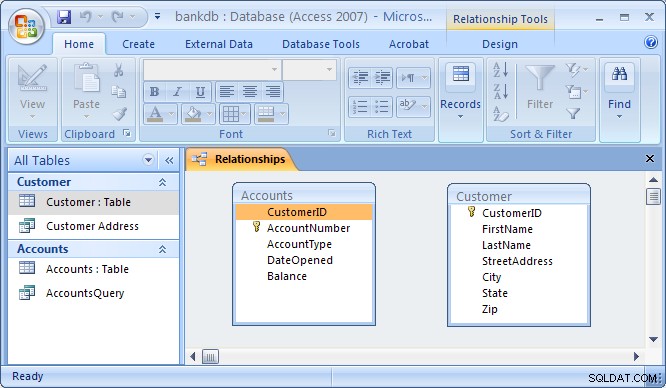
Para conectar a tabela Customers à tabela Accounts para formar um relacionamento, clique no campo CustomerID na tabela Customers e arraste-o para cima do campo CustomerID na tabela Accounts. Ao soltar o botão do mouse, a caixa de diálogo Editar Relacionamentos aparecerá conforme abaixo:
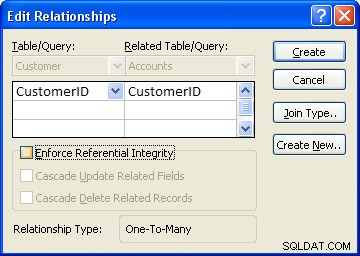
O Access fará o possível para determinar o Tipo de Relacionamento (quase sempre selecionará Um para muitos ). Para este exemplo, o Access sabe que CustomerID é uma chave da tabela Customer, por isso escolhe este campo como o lado “One”. Isso torna a tabela Contas do lado "Muitas" como Uma o cliente pode ter Muitos contas.
Uma etapa adicional a ser tomada é marcar a caixa rotulada “Reforçar a integridade referencial”. This option puts constraints into effect such that an Accounts record can not be created without a valid Customer record, and Access will also prevent a user from deleting a Customer record if a related Accounts record exists. At this point, click on the Create button to create the relationship. The Relationships screen should reappear with the new relationship in place as follows:
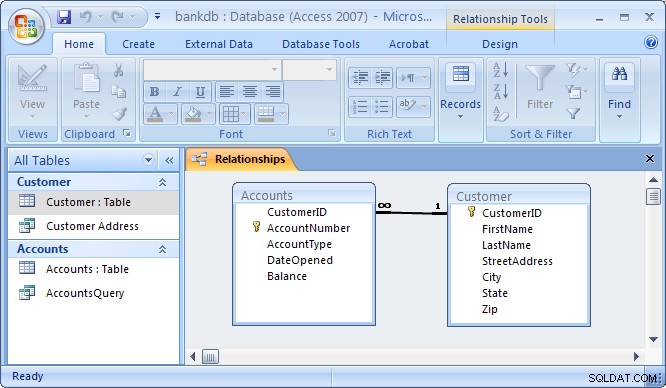
Note the symbols “1” (indicating the “One” side) and the infinity symbol (indicating the “Many” side) on the relationship. Close the relationships screen and select Yes to save the changes to the Relationships layout.
If the relationship does not appear in the above fashion, highlight it and press the delete key to delete it. Then go back to the table design view and make certain that the CustomerID field is designated as the key of the Customers table. Then go back to the Relationships screen and try to recreate the relationship.
5.6 Review of Creating and Viewing Tables
Creating a new table requires the following steps:
- Click on the Tables tab on the Access main screen
- Click on the New button.
- Choose the Design View and click the OK button.
- Fill in the name, data type and description of each of the fields in the table.
- Designate a primary key by clicking on one of the fields with the right mouse button and then choose Primary Key from the pop-up menu.
- Save the table by pulling down the File menu and choosing Save.
- Close the new table by pulling down the File menu and choosing Close.
To change the design of an existing table (e.g., to add, change or delete a field):
- Click on the Tables tab on the Access main screen
- Highlight the name of the table to be modified and click on the Design button.
- Make the necessary changes.
- Save the table by pulling down the File menu and choosing Save.
- Close the table by pulling down the File menu and choosing Close.
To add, delete or change data in an existing table:
- Click on the Tables tab on the Access main screen
- Highlight the name of the table to be modified and click on the Open button.
- Make the necessary changes to the data.
- Save the table data by pulling down the File menu and choosing Save.
- Close the table by pulling down the File menu and choosing Close.
To create or edit relationships between tables:
- Pull down the Tools menu and select the Relationships menu item.
- To display tables, right click and choose Add Tables
- To create new relationships, drag a key field from one table and drop it on the associated field in another table
- To edit an existing relationship, double click on the relationship line.
- To delete an existing relationship, click on the relationship line and press the delete key.
6 Creating and Running Queries
Queries are a fundamental means of accessing and displaying data from tables. Queries can access a single table or multiple tables. Examples of queries for our bank database might include:
- Which Customers live in Georgia ?
- Which Accounts have less than a $500 balance ?
- What is the total amount of money deposited by each Cusomter?
- Which Checking account has the largest balance?
Queries can be used to carry out other tasks such as for creating formatted reports and data entry forms, and for exporting subsets of data to Excel or another software program.
In this section, we show how to use the Access Wizards to create queries for a single table and for multiple tables.
6.1 Single Table Queries
In this section, we demonstrate how to query a single table. Single table queries are useful to gain a view of the data in a table that:
- only displays certain fields (columns) in the output
- sorts the records in a particular order
- performs some statistics on the records such as calculating the sum of data values in a column or counting the number of records, or
- filters the records by showing only those records that match some criteria. For example, show only those bank customers living in GA.
Creating a query can be accomplished by using either the query design view or the Query wizard. In the following example, we will use the query wizard to create a query.
To create a new query, click on the Create tab. Then click on the Query wizard button.
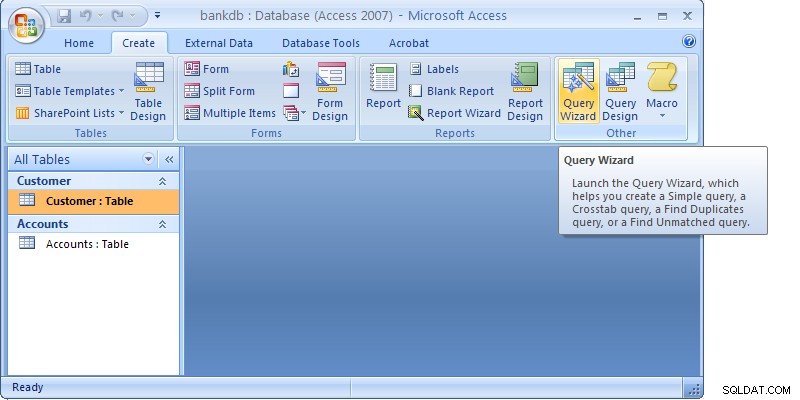
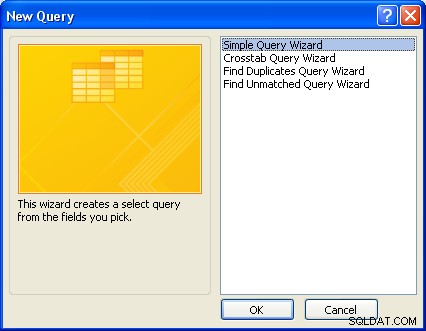
When the Query wizard appears, highlight the Simple Query Wizard selection and click on the OK button.
The first step in the Simple Query wizard is to specify the table for the query and which fields (columns) should be displayed in the query output. Three main sections of this step are:
- Tables/Queries – A pick list of tables or queries you have created.
- Available Fields – Those fields from the table that can be displayed.
- Selected Fields – Those fields from the table that will be displayed.
For this example, pull down the Tables/Queries list and choose the Customer table. Notice that the available fields change to list only those fields in the Customer table. This step is shown below:

From the list of Available fields on the left, move the FirstName, LastName, StreetAddress, City and State fields over to the Selected Fields area on the right. Highlight one of the fields and then click on the right arrow button
 in the center between the two areas. Repeat this for each of the four fields to be displayed. When done with this step, the wizard should appear as below:
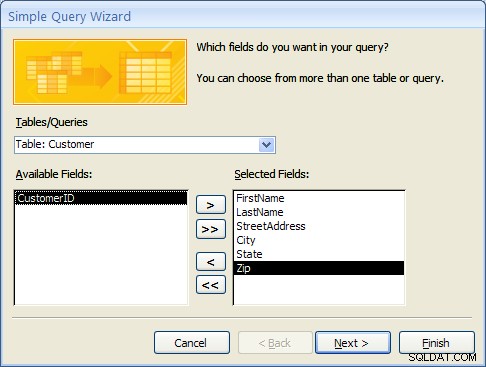
Click on the Next button to move to the next and final step in the Simple Query wizard.
In the final step, give your new query a name. For this example, name the query:Customer Address
At this point, the wizard will create the new query with the option to either:
- Open the query to view information – that is, the wizard will execute the query and show the data.
- Modify the query design – the wizard will switch to the Design View to allow further modification of the query.
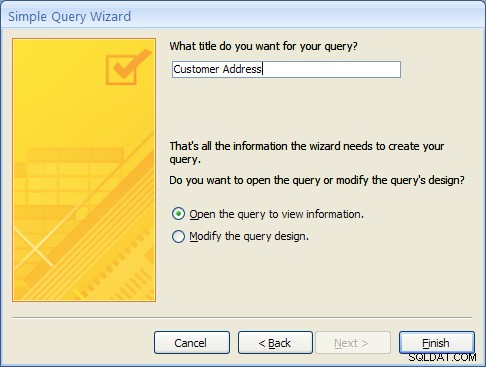
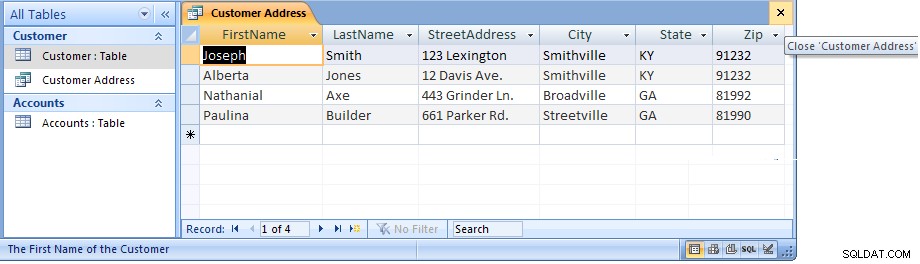
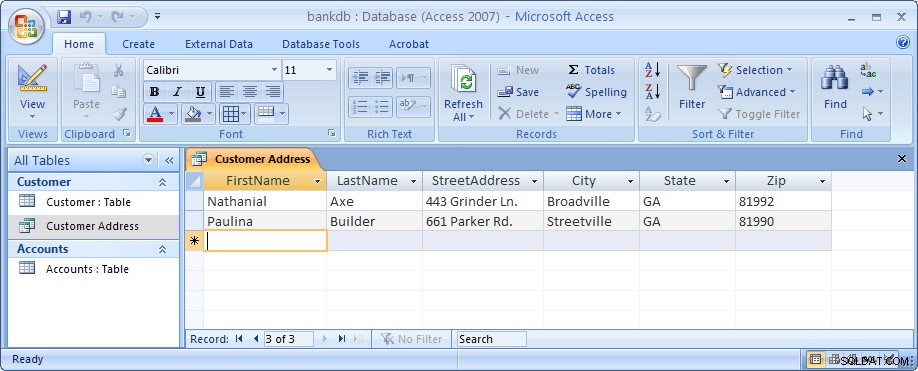
For this example, choose Open the query to view information and click on the Finish button. When this query executes, only the customer’s name, address, city and state fields appear, however, all of the rows appear as shown in the figure below:

Close this query by clicking on the X in the upper right corner of the query results as shown in the figure below:
The Access main screen showing the Queries tab should appear. Note the new query Customer Address appears under the Customers table.
6.1 Single Table Queries (Continued)
In the following example, we will modify the Customer Address query to only display customers in a certain state. To accomplish this, we will make use of the Query Design View.
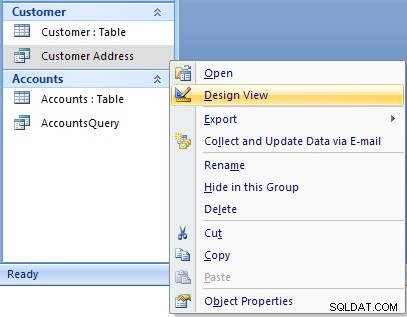
Open up the Customer Address query in the design view by right-clicking on the name of the query. Then select the Design View menu item as shown below.
The design view will appear as in the figure below:
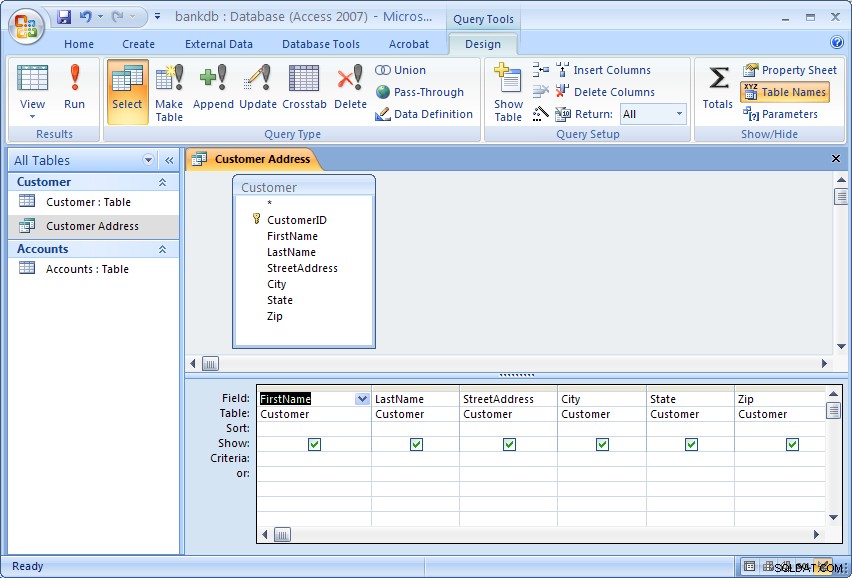
The Query Design view has two major sections. In the top section, the table(s) used for the query are displayed along with the available fields. In the bottom section, those fields that have been selected for use in the query are displayed.
Each field has several options associated with it:
- Field – The name of the field from the table
- Table – The table the field comes from
- Sort – The order in which to sort on this field (Ascending, Descending or Not Sorted)
- Show – Whether or not to display this field in the query output
- Criteria – Indicates how to filter the records in the query output.
For this example, we will filter the records to only display those customers living in the State of Georgia (GA). We will also sort the records on the City field.
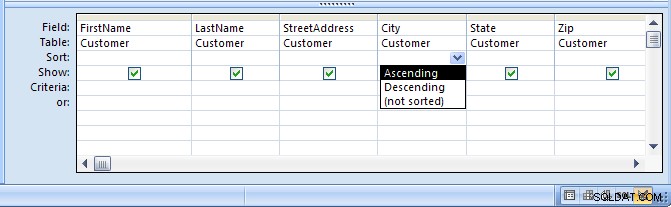
To sort the records on the City field, click in the Sort area beneath the City campo. Choose Ascending from the list as shown in the figure below:
To filter the output to only display Customers in Georgia, click in the Criteria area beneath the State field and type the following statement: ='GA'
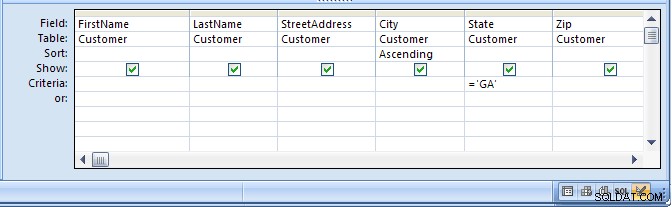
The ='GA' statement tells Access to only show those records where the value of the State field is equal to ‘GA’. Note the use of single quotes to surround the characters.
Run the query by clicking on the Run button (with the large red exclamation point). The output is shown in the figure below:
Finally, save and close this query to return to the Access main screen.
6.2 Exercise:Single Table Queries
For this exercise, use the Simple Query wizard to create a query on the Accounts table showing just the AccountNumber, AccountType and Balance fields.
- From the Access main screen, click on the Create tab. Then click on the Query Wizard button.
- Choose the Simple Query wizard option and click on the OK button.
- Under Table/Queries:choose the Accounts table. Then move the AccountNumber, AccountType and Balance fields over to the Selected fields area. Then click the Next button.
- In the next panel, you will be asked to choose between a detail or summary query. Choose detailed query and click on the Next button.
- Name the new Query :AccountsQuery and click on the Finish button.
The output is shown below:

Close this query by pulling down the Office menu and choosing Close.
In the next part of the exercise, we will modify the query to sort the output on the account number and only display the Savings accounts.
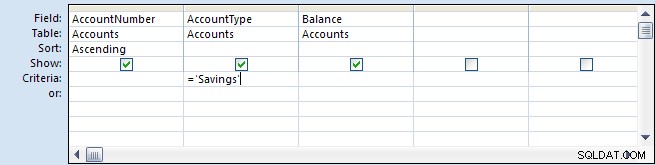
- From the Queries tab on the Access main screen, highlight the AccountsQuery and click on the Design button.
- Change the Sort order for the AccountNumber field to Ascending.Add the following statement to the Criteria:are under the AccountType field:=‘Savings’
- Run the query by double-clicking on the AccountsQuery name. The output is shown below:
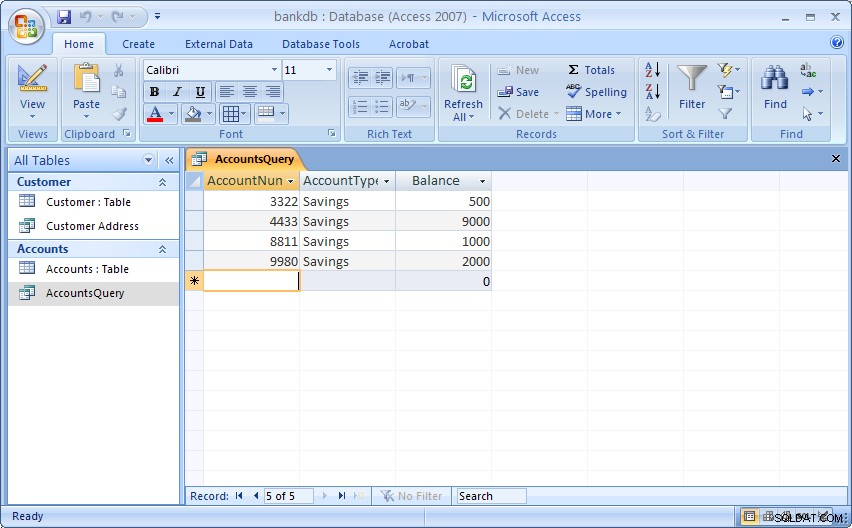
- Finally, save and close the query to return to the Access main screen.
6.3 Multiple Table Queries
Up to this point, queries involving only one table have been demonstrated. It is almost a given that queries will need to involve more than one table. For this example, assume that a manager would like to see a list of all of the customers and the type of account(s) that each one maintains at the bank. Such a query requires data from both the Customers table as well as the Accounts table. In such queries, Access will rely on the Relationships established between tables to guide how the data will be assembled to satisfy the query.
Before proceeding with these next instructions, make certain the One-to-Many relationship between the Customers and Accounts table has been created (see section 5.5 Creating Relationships for a review of this process).
To start the process of creating a multiple table query, highlight the Create tab and click on the Query Wizard button to create a new query. Select the “Simple Query Wizard” option as was done previously.
When the simple query wizard appears, select the CustomerID and LastName fields from the Customers table, then switch the Tables/Queries selection to the Accounts table and select the CustomerID, AccountType and Balance fields from the Accounts table. The result from this step is down below:
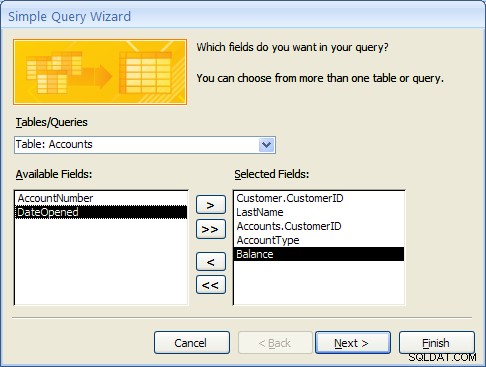
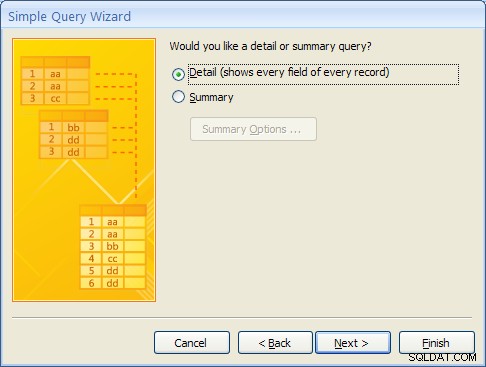
Click the Next button to continue. In the next step of the wizard, an option will appear to provide some level of Summary. For this example, leave the default at “Detail …” as shown below and then click on the Next button.
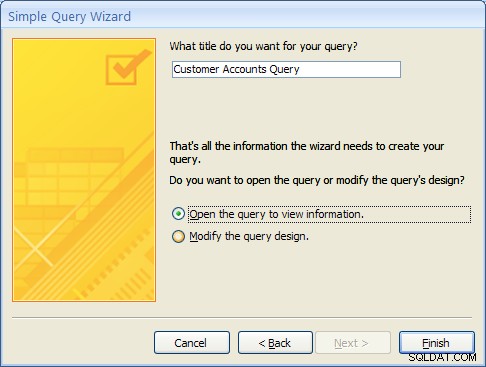
In the final step of the wizard, name the query “Customer Accounts Query” and click on the Finish button. The multiple table query results should appear as follows:
MS Access knows how to line up (or “join”) the accounts table to the Customer table for this query due to the relationship that was created when the tables were first defined.
As with single table queries demonstrated previously, one can change the query definition in design view by adding filters (e.g., show account information for all customers in ‘GA’).
6.4 Exercise:Multiple Table Queries
For this exercise, create a new query called “Accounts Summary Query” that joins the Customers table (include the CustomerID and LastName fields) with the Accounts table (include the Balance field only). In the second step of the wizard, click on the Summary choice (instead of Details) and then click on the Summary Options… button. Check off all of the Summary option boxes such as Sum , AVG , Min and Max as shown in the figure below:
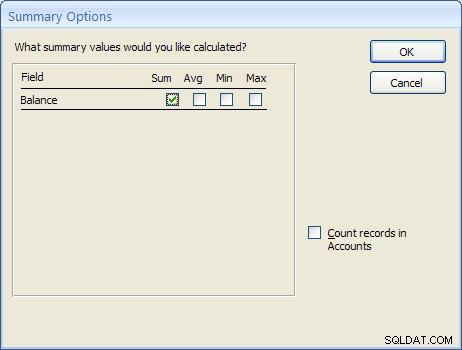
The resulting query should appear as follows:
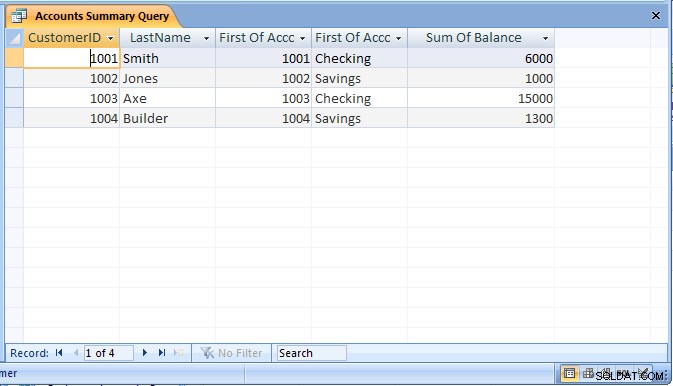
Be sure to save the query as “Accounts Summary Query”.
6.5 Review of Creating and Running Queries
In this section, the basic steps for creating and running queries were introduced. The query wizard can be used to create simple queries that access a single table. It is also possible to then modify the query to sort or filter the records.
Creating a query using the query wizard:
- From the Access main screen, click on the Queries tab. Then click on the New button.
- From the Queries tab on the main Access screen, click on the New button and choose the Simple Query wizard option.
- Under Table/Queries:choose the appropriate table for the query and then indicate which fields in the table will appear in the query output.If querying more than one table, change the Table/Queries:selection to display additional tables and select the necessary fields.
- If the table contains numeric fields, either detailed or summary information may be specified for the query.
- Finally, name the new query and click on the Finish button.
As a final note, Forms and Reports can be created based on existing queries.
7 Creating and Running a Data Entry Form
Data entry forms are the primary means of entering data into tables in the database. In a previous section, we described how to add data to a table using a spreadsheet-like view of the data. Data entry forms offer a more user-friendly interface by adding labels for each field and other helpful information.
Access provides several different ways of creating data entry forms. Esses incluem:
- Creating the forms by hand using a Design View
- Creating a default form based on all of the fields available in a table or a query
- Creating a form based on a number of different wizards that walk the user through the forms creation process.
As with queries, a data entry form can be based on a single table or it can work on multiple tables at the same time.
In this section, we cover the basic steps for using a wizard to create a data entry form based on a single table. After this exercise, a multiple-table form is demonstrated.
7.1 Creating a Single Table Form using the Wizard
In this example, we will create a simple data entry form for the Customer table. To begin the process, click on the Create tab on the Access main screen. As with the other components in Access, there are buttons for creating a New form, Open an existing form and Design an existing form. For this example, click on the New button to create a new form.
Several buttons for creating a new form will appear. For this tutorial, choose the Form wizard.
In the first step of the Form wizard, we need to specify the fields from the Customer table that will appear on the form. In this case, we want all of the fields to appear. Move each of the fields from the Available Fields side over to the Selected Fields side as in the following figure. Then click on the Next button.

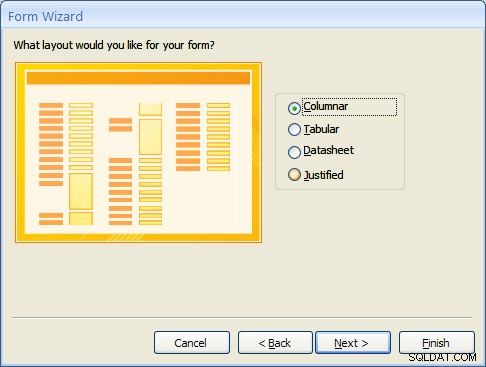
Forms can have several different layouts or arrangement of the labels and fields on the screen.
- Columnar – Places the labels to the left of each field. This is similar to a paper form. This layout is suitable for viewing data one record at a time.
- Tabular – Places the field labels at the top of the screen and the records are displayed below. This is similar to how a spreadsheet would display the data and is suitable for displaying multiple records of data at a time.
- Datasheet – The data appears in the same fashion as when viewing or adding data to a table.
- Justified – Places the labels above each field with the fields spread out on the form. This is suitable for viewing a single record at a time as with the columnar layout.
For this example, choose the columnar layout as shown in the figure below and click on the Next button.
At this point, MS Access 2007 and 2010/2013 versions are a bit different. Access 2007 will show several sample display styles that determine how the form will appear, including elements such as fonts, colors and the background used in the form. Access 2010 and 2013 skips this step in this wizard and provides styles that can be applied to the form in Design mode. For this example, for MS Access 2007, select the Office style as shown below and click on the Next button.

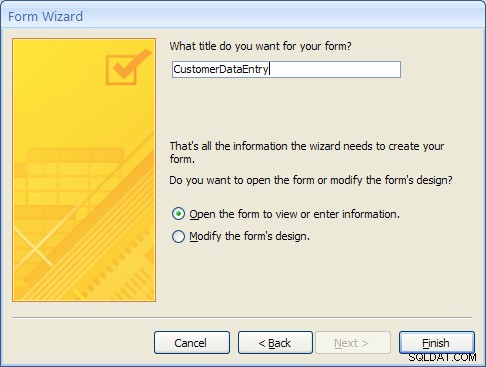
As a final step, give this new form the name:CustomerDataEntry and then click on the Finish button as shown below:
The new form will be created by the wizard and then opened. It should appear as in the figure below:
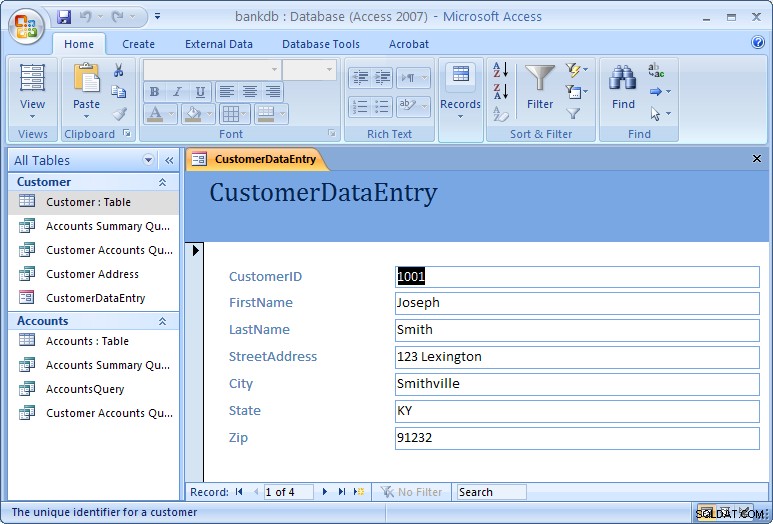
Use the tab key to navigate between fields in the form. To move to the next or previous record, use the record navigation bar at the bottom of the form:
The buttons on the navigation bar perform the following functions:
 | Go to the first record. |
 | Go to the previous record. |
 | Go to the next record. |
 | Go to the last record.  Go past the last record to add a new record. Go past the last record to add a new record. |
To close the form and return to the Access main screen, pull down the File menu and choose Close.
To open the form at any time, highlight the form name under the Forms tab on the Access main screen and click on the Open button.
One quick final note on forms. When the form is created, MS Access looks at how the table is designed and creates the form based on the properties of the table. If you make any changes to the table, you will need to re-create the form again in order to see those table changes reflected in the form. One example where this might happen is is if you change a column in your table from a text box to a combo box, or if you add or remove any columns from your table.
7.2 Exercise:Creating a Single Table Form
For this exercise, we will create a data entry form for the Accounts table created in a previous exercise.
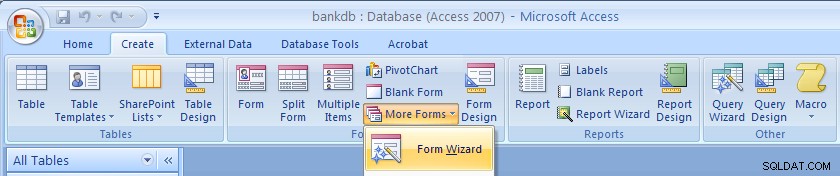
- Click on the Create tab on the Access main screen and then click on the More Forms… button and the “Forms Wizard” to create a new form.
- Select the Accounts table and all of the available fields and click on the Next button.
- Choose a Tabular layout and click on the Next button.
- For Access 2007 choose the Office style and click on the Next button.
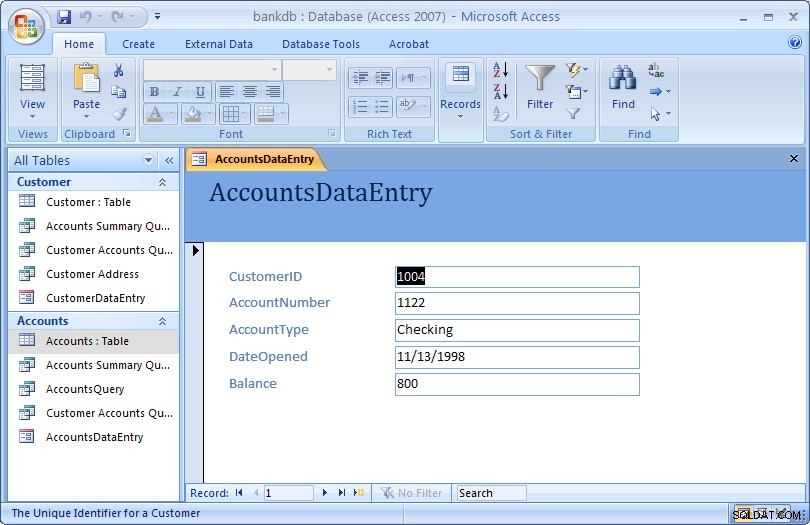
- Name the form:AccountsDataEntry Then click on the Finish button to create, save and view the new form.
The new form is shown in the figure below:
Close the form and return to the Access main screen, by pulling down the File (or Office) menu and choosing Close.
7.3 Review of Creating and Running a Data Entry Form
The basic steps for creating a simple data entry form are:
- Choose a table and a form wizard
- Specify the fields (columns) that will appear in the form
- Specify the layout for the form
- Specify the style (fonts/colors, etc.) for the form
- Save, create and run the new form
In this section we covered the basic steps required to create and run a data entry form. Access provides wizards which are adept at building simple forms with a minimal amount of work. More advanced work on forms would concentrate on using the Design View to change a form’s appearance and to add or remove fields and labels once a form is created. A more advanced tutorial on MS Access Forms Design is linked here.
8 Creating and Running a Report
Reports are similar to queries in that they retrieve data from one or more tables and display the records. Unlike queries, however, reports add formatting to the output including fonts, colors, backgrounds and other features. Reports are often printed out on paper rather than just viewed on the screen. They can also be attached to e-mail and exported and posted as web pages.
As with data entry forms, there are a number of ways to create reports in MS Access:
- A report can be created “by hand” in Design view
- A default report can be created automatically based on all of the firleds for a given table.
- A report can be created using the Create Report wizard.
In this section, we cover how to create simple reports using the Report wizard.
8.1 Creating a Single Table Report using the Wizard
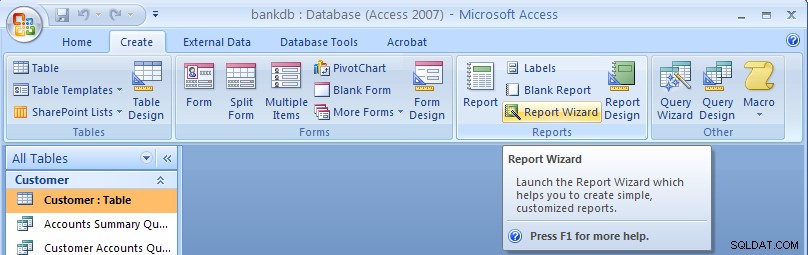
In this example, we will create a simple report for a single table using the Report wizard. As with the Queries and Forms, we begin by selecting the Create tab from the Access main screen.
To create a new report, click on the Report Wizard button.
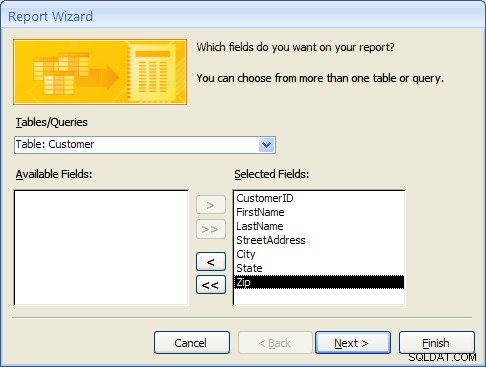
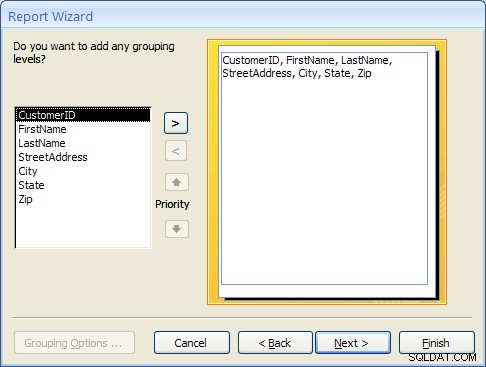
In the next step of the Report wizard, is used to specify the fields from the Customer table that will appear on the report. In this case, we want all of the fields to appear. Move each of the fields from the Available Fields side over to the Selected Fields side as in the following figure. Then click on the Next button.
In the next step, we have the opportunity to add Grouping Levels to the report. A grouping level is where several records have the same value for a given field and we only display the value for the first records. In this case, we will not use any grouping levels so simply click on the Next button as shown below.
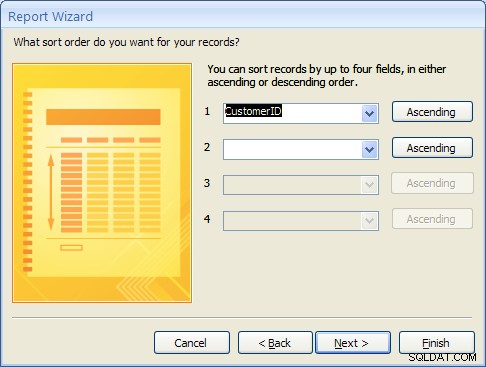
In the next step, the sorting order of the report can be specified. For this example, we will sort the records on the CustomerID field. To achieve this, pull down the list box next to the number 1:and choose the CustomerID field as shown in the figure below. Then click on the Next button.
8.1 Creating a Single Table Report using the Wizard (Continued)
The next step is to specify the layout of the report. The three options are:
- Columnar – Places the labels to the left of each field. This is similar to a paper form.
- Tabular – Places the field labels at the top of the report page and the records are displayed below. This is similar to how a spreadsheet would display the data.
- Justified – Places the labels above each field with the fields spread out on the report page.
Generally, reports use the tabular layout. For this example, choose Tabular layout and set the page Orientation to Landscape so that all of the fields will fit across one page. This is shown in the figure below. Click on the Next button to continue.

In the next step, the style of the report can be selected. For this example, choose the Office style and click on the Next button to continue.

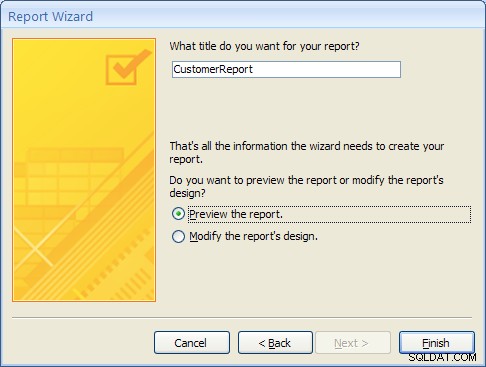
Finally, give a name for the new report:CustomerReport and then click on the Finish button to create, save and display the new report.
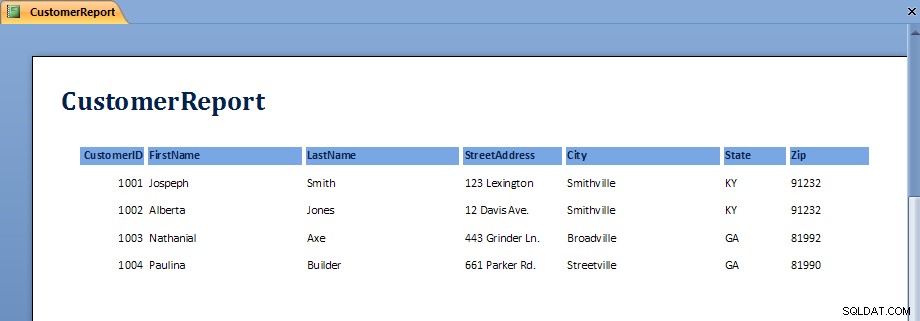
The output from the report is shown in the figure below. Note that on some screens, the last field, Zip, may not display without scrolling over to the right.
Once the report is displayed, it can be viewed, printed or transferred into Microsoft Word or Microsoft Excel. The button bar across the top of the screen has the following functions:
 | Print the report |
 | Zoom into a region of the report |
 | Display the report as one, two or multiple pages |
 | Zoom into or out of the report |
 | Transfer the report into MS Word |
 | Close the report |
To close the report and return to the Access main screen, click on the Close button.
8.2 Exercise:Creating a Single Table Report
For this exercise, we will create a report showing all of the Accounts information.
- From the Access main screen, click on the Create tab and Click on the Report wizard.
- Select all of the fields in the Accounts table by moving them all over to the Selected Fields side and then click Next
- Group the report by CustomerID by clicking on the CustomerID field and then clicking on the right arrow button. This is shown in the following figure:
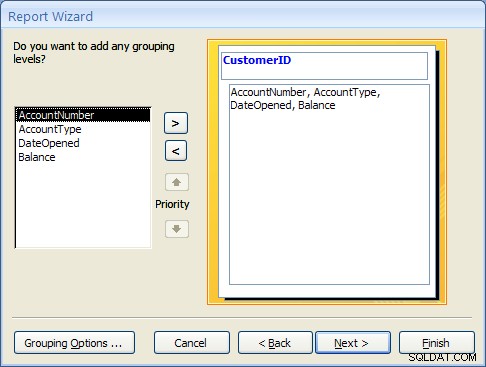
Click on the Next button to continue. - Choose to sort the report on the AccountNumber campo. Note that a new button will appear called Summary Options.
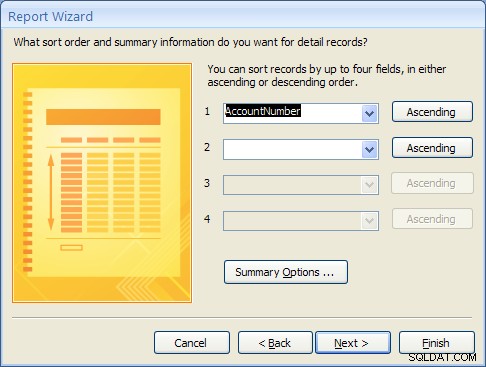
Click on the Summary Options button. Choose the Balance field and select the Sum option. Choose the option to show both Detail and Summary data. Then click on the OK button.

Click on the Next button. - Choose a Block layout and click on the Next button.
- Choose the Corporate style and the click on the Next button.
- Finally, name the report:AccountsReport and click on the Finish button to create, save and run the report.
The output from the AccountsReport is shown below:
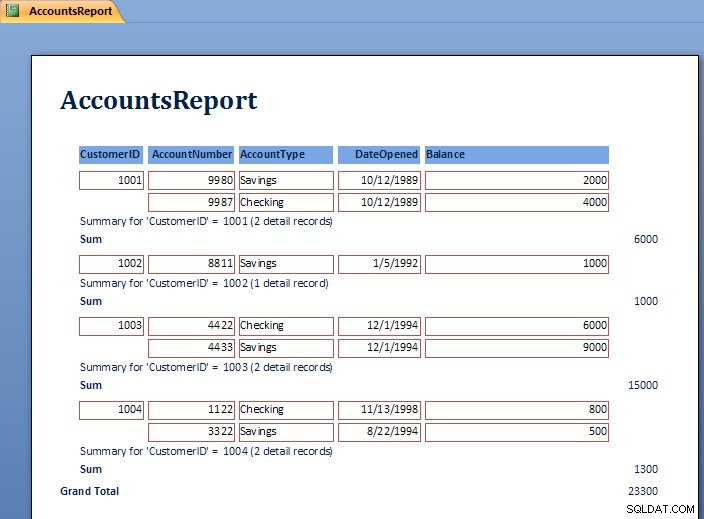
Note the Grouping at the level of the CustomerID and the Sum for each customer’s balances.
To close the report and return to the Access main screen, pull down the File menu and choose Close.
8.3 Review of Creating and Running a Report
As can be seen in the report exercise, there are many ways to create reports to show summation, sorting and layout of the data. Further study of Reports will show how to modify the layout using the Design View. Students are encouraged to work with the Report wizards to create different styles and types of reports.
9 Creating and Running a Master/Detail Form
Master/Detail forms are used to display data from two tables at the same time. MS Access calls the “details” a “subform”. The forms are linked according to the relationship between the tables. Recall that in the example database, the CustomerID is used to link the Customer table (Master) to the Accounts table (Detail). In this section a master / detail form for the Customer and Accounts tables will be created.
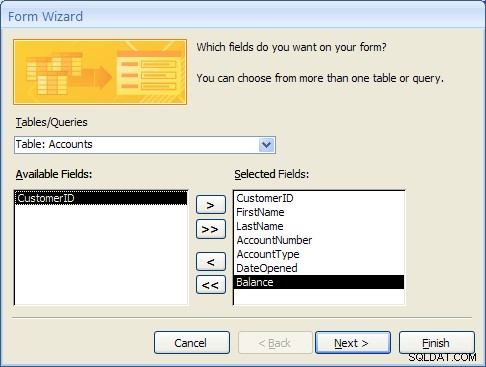
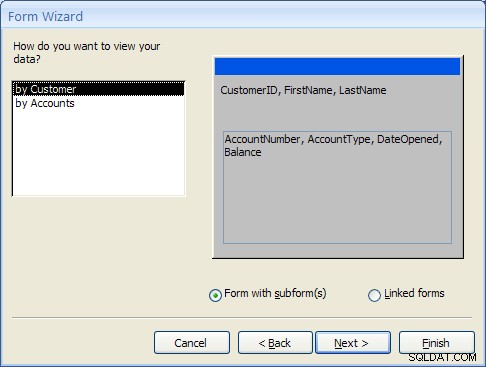
- From the Access main screen, click on the Create tab and Click on the “More Forms…” section and finally the “Forms Wizard”.Select the Customer table first and move the CustomerID, FirstName and LastName fields to the Selected Fields list.Next, select the Accounts table and move the AccountNumber, AccountType, DateOpened and Balance fields to the Selected Fields list as shown below.
Click the Next… button to move to the next step. - At this point MS Access detects that this form will involve data from two different tables. The first prompt asks how the form should be organized at the top or “Master” level. The “by Customer” selection should be highlighted.The second prompt asks how the forms should be created. For this example, select “Form with Subform(s)” as shown below and click the Next… button to move to the next step.
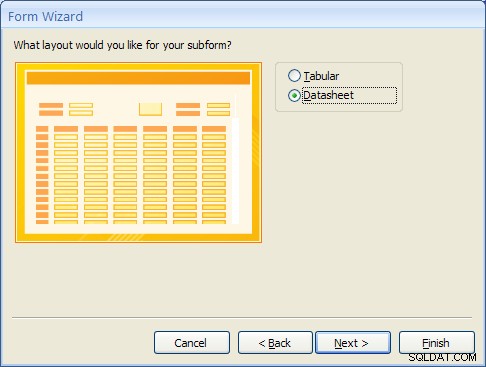
- The Subform is the form that will display the detailed data from the Accounts table. Selecting the “Datasheet” layout will make it easy for the user to view the multiple accounts a Customer may have. Select “Datasheet” and click the Next… button to move to the next step.
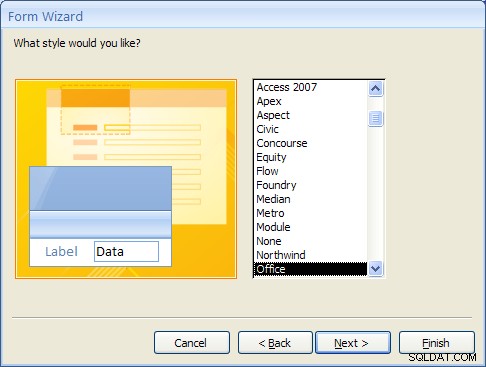
- For Access 2007, select the Office style and click the Next… button to move to the next step. (This step will not appear in MS Access 2010 or 2013).
- Finally, give the main form the name “CustomerMasterForm” and the Subform the name “Accounts Subform”.
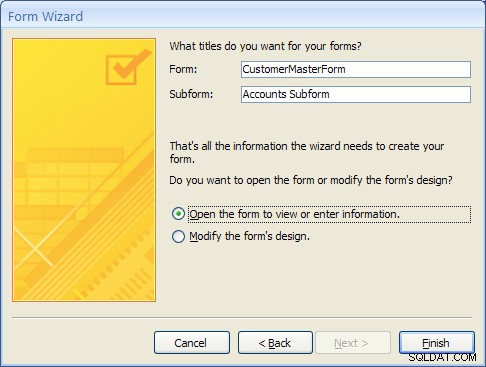
- After clicking on the Finish button the new Master/Detail form will appear as shown below.
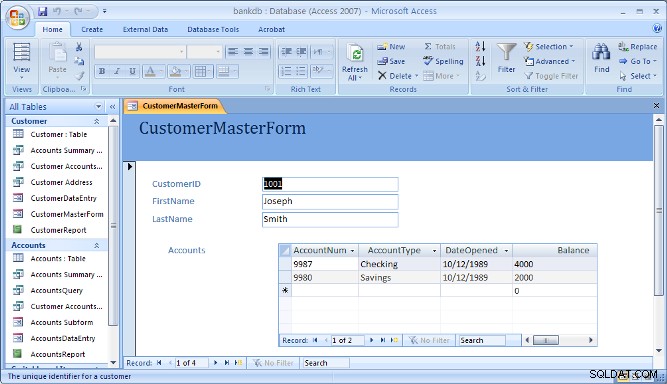
Note that the navigation bar at the bottom of the form is used to navigate through the records in the Master (or top) part of the form.
10 Creating and Running a Switchboard
A Switchboard is a type of form that displays a menu of items that a user can click on to launch data entry forms, reports, queries and other actions in the database. A switchboard is typically created after all of the forms and reports for a database application have been completed. It can be used to guide the user to an appropriate set of forms and reports.
Note that starting with Access 2010, Switchboards are not available by default (you will need to add this to the ribbon bar manually using the Options). Access 2010 and 2013 make use of the Navigation Forms.
In this section, a default switchboard will be created.
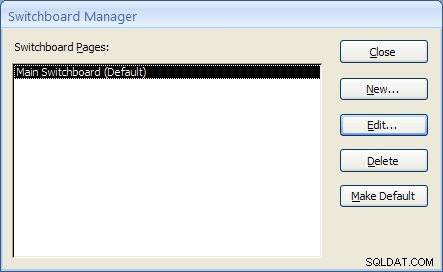
- From the Access main screen, click on the Database Tools tab and Click on the Switchboard Manager as shown in the figure below.

If this is the first switchboard made for this database, you will be prompted to create a new one as shown below. Click the Yes button.

- The Switchboard manager will appear as shown below:
- Click on the Edit menu to edit the “Main Switchboard”. The Edit Switchboard Page will appear as shown below:
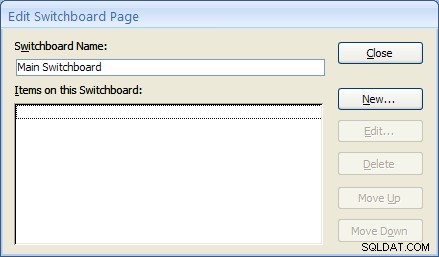
- Add a new switchboard item by clicking on the New… button. The Edit Switchboard Item form will appear as shown below. Fill in the fields as follows:
Text: Customer Data Entry Form Command: Select Open Form in Edit Mode from the drop down list. Form: Select the “CustomerDataEntry” form from the drop down list.
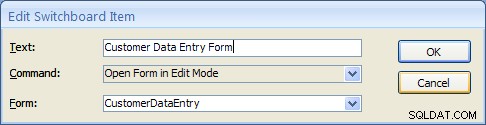
Click on the OK button to save this new Switchboard item. - Repeat the above step two more times to add Switchboard items for the Accounts DataEntry form and the Customer Report.
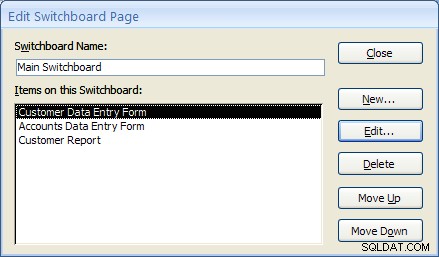
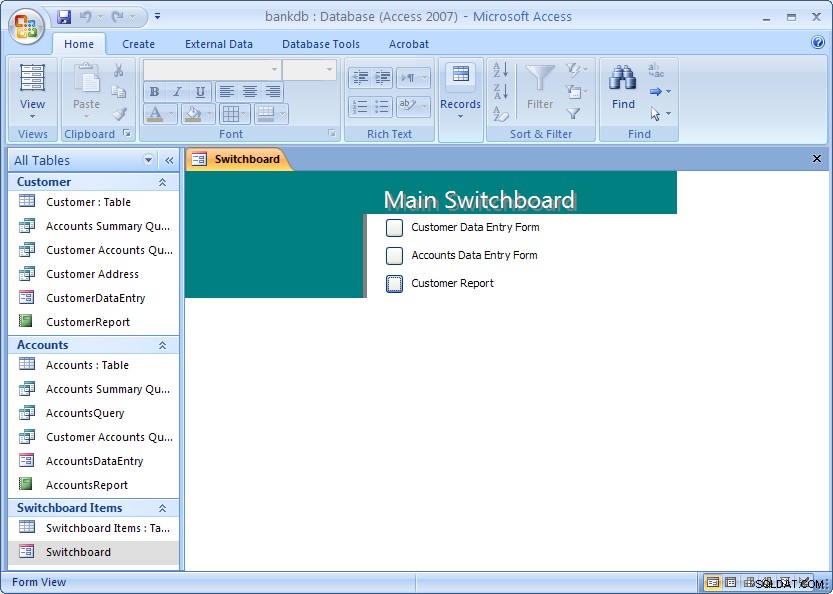
Once completed, click the Close button. Then click the Close button once more to close the Switchboard manager. - From the main MS Access screen look for a new section labeled Switchboard items. To view the switchboard, double-click on name “Switchboard”.
The next section covers creating a Navigation Form which is the recommended navigation screen for MS Access 2007, 2010 and newer versions.
11 Creating and Running a Navigation Form
MS Access 2010 introduced a new form called a Navigation Form. Navigation forms take the place of Switchboards but provide much the same functionality. Namely, they are designed to give the user the ability to run forms and reports without having to hunt through all of the different menus and lists objects. Typically a database application will have one main Navigation form that will appear when the database is opened.
In this section, the basic steps for creating and running a Navigation Form in MS Access 2010 will be demonstrated.
A Navigation Form is another type of form in MS Access 2010 and 2013
- To get started, click on the Create tab on the Access 2010 or 2013 ribbon bar. Under the section for Forms look for the item labeled Navigation Form. Note that this may be located on the button labeled Other Forms.
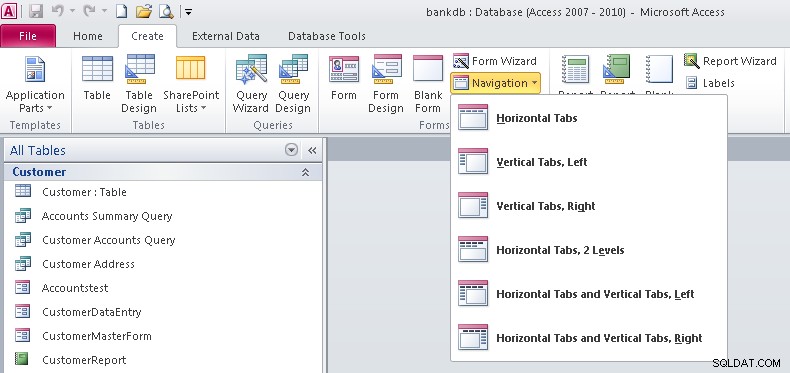
- Note that there are 6 different default styles of Navigation Forms. Each one places the buttons in a different configuration on the screem. Buttons can be aligned across the top, either side or some combination.For this tutorial select the Horizontal Tabs configuration which appears as the first item on the list.
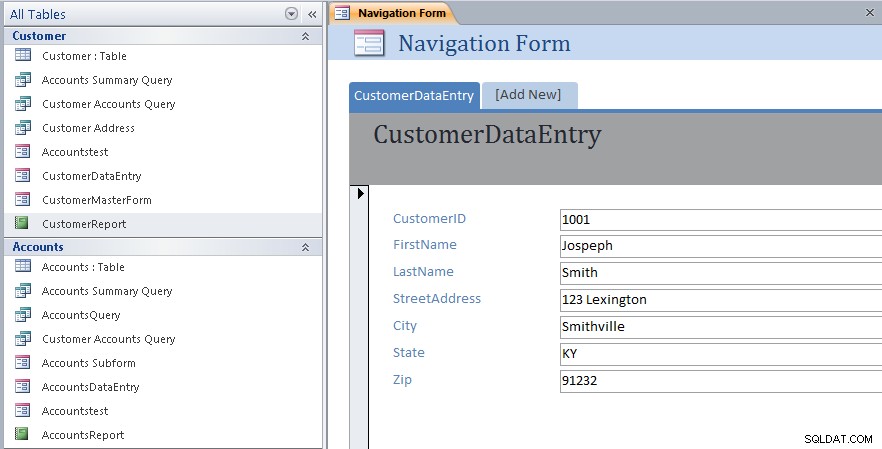
- At this point a new Navigation Form will be created with a row of tabs across the top. The first tab will be labeled [Add New]
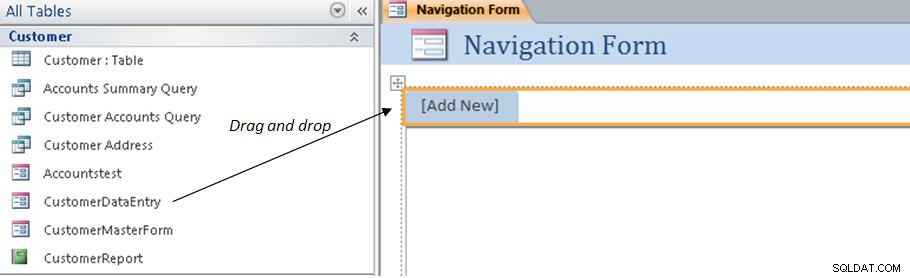
- To add items to the Navigation form, drag the items from the list on the left over to the spot on the Navigation Form labeled [Add New]. This is shown by the arrow in the above figure. For example, drag over the CustomerDataEntry form to the Navigation Form. The result is shown below.
- Next drag and drop the CustomerMasterForm as shown below.

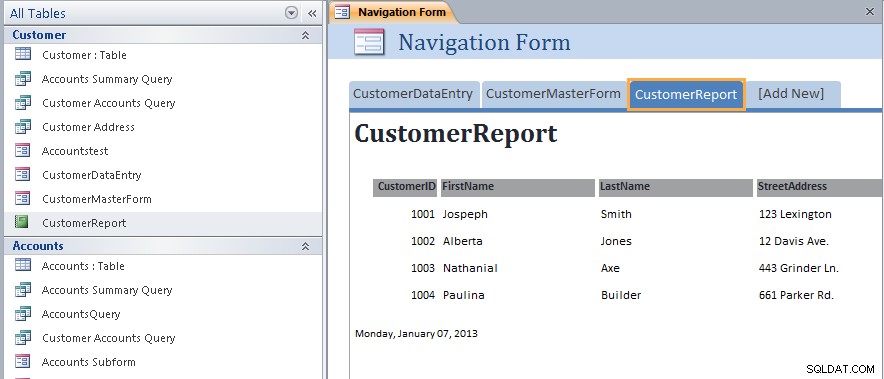
- Next drag and drop the CustomerReport as shown below.
- At this point we have created a new navigation Form and added three items along the top of the page. Save the Navigation Form by right-clicking on the name of the form and choosing Save as shown below:
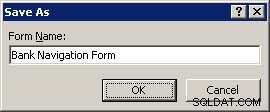
- Name the Navigation Form:Bank Navigation Form and click the OK button.
- Close up the Navigation Form by right-clicking again on the name of the form and choosing Close menu item.At this point the new Navigation Form has been created and saved. The next step will be to view the Navigation Form and navigate the different forms and reports linked to it.
- To view the Navigation Form, look for the Unrelated Objects group on the left side of the screen. Double click on the Bank Navigation Form item as shown below:
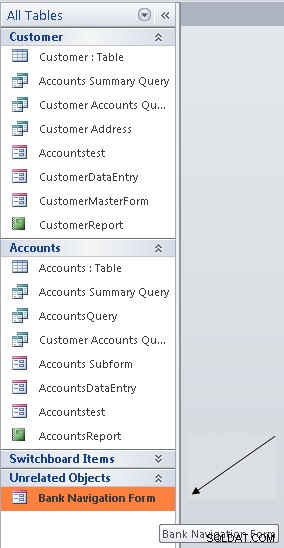
The Navigation Form will appear:
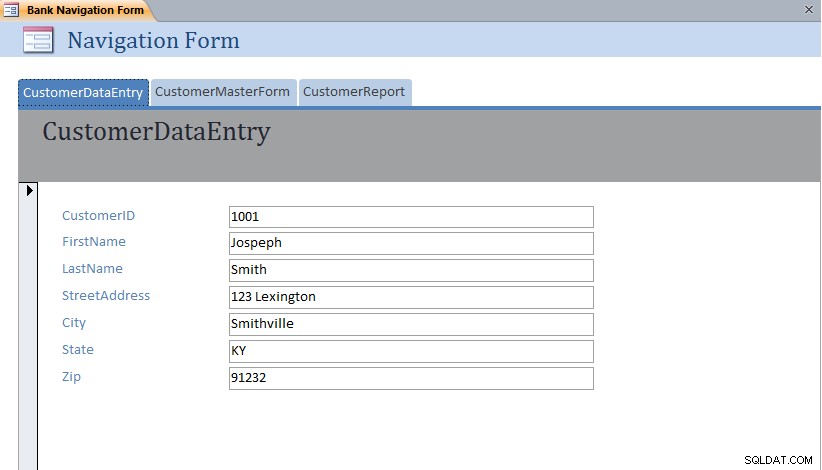 Note that each form or report can be displayed simply by clicking on the different tabs across the top of the Navigation Form.
 11.1 Exercise:Modifying a Navigation Form
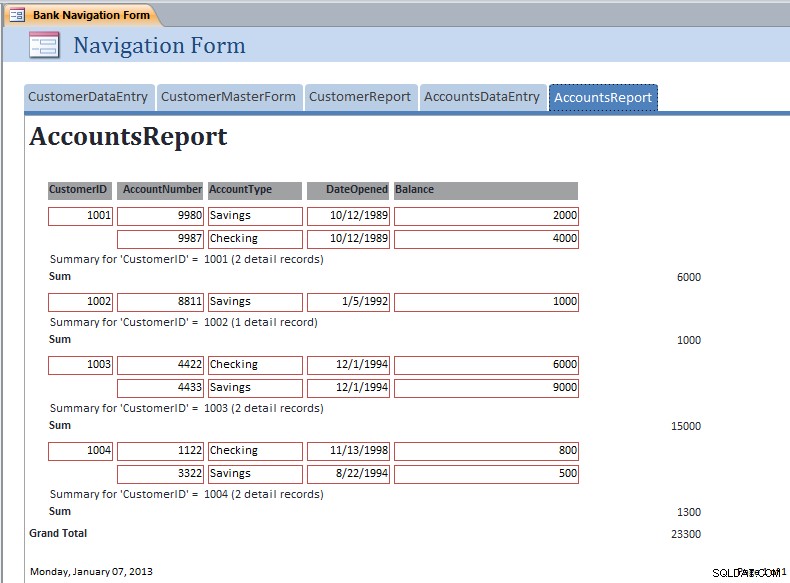
For this exercise, edit the Bank Navigation Form in Layout View and add the following new items to the Navigation Form:
- AccountsDataEntry
- AccountsReport
The resulting Navigation Form should appear as below with the AccountsReport opened:
11.2 Setting the Navigation Form as the Default
MS Access 2007 and 2010 (as well as earlier versions) have the ability to set a default form that will open up automatically once the MS Access data file is opened. This is especially useful for end users so that they always see the same form when they open up the database.
To set the Default Form, pull down the File menu and select the Options menu item.

The Database Options form will appear. Click on the Current Database item on the left hand side.
Under the Application Options heading, look for the Display Form:prompt and set this to the Bank Navigation Form as shown below:
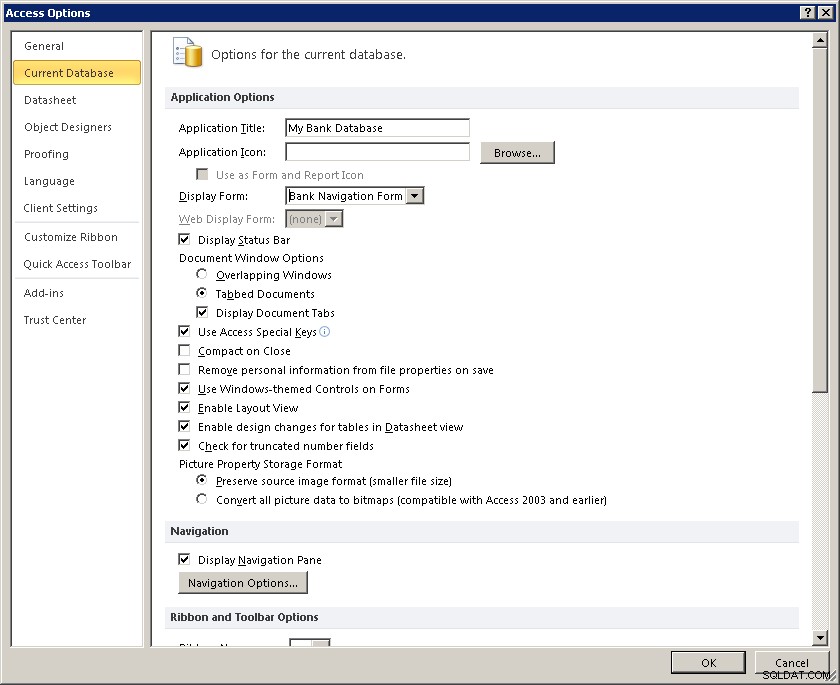
Click on the OK button to close up the Database Options screen.
The next time this database (bankdb.accdb) is opened, the Bank Navigation Form will open up.
12 Tutorial Summary
In this tutorial, we have covered the basics for creating an Access database including tables with data, queries to retrieve data, forms to enter data and reports to display and summarize data.
Students are encouraged to further their Access knowledge and skills by working through more advanced tutorials such as Advanced Access Database Table Design and Advanced Access Forms Design, and by reading the on-line help and Access documentation.
You may also be interested in this tutorial that covers up-sizing the Access database to Microsoft SQL Server using the Microsoft SQL Server Migration Assistant.